A Guide to Properly Designing a Stunning Table
A gorgeous formal table setting is a key component for a noteworthy night. Whether you’re hosting an evening dinner party, or a holiday gathering, memories are made around a beautiful table. Give your guests the royal treatment by learning how to set a formal dining table filled with shimmering glasses, elegant silverware, stylish plates, serving ware and linens.
If you are wondering how to navigate which plates, glasses, and utensils are needed for different courses, not to worry. We’re going to walk you through an easy guide filled with diagrams on how to achieve a stunning table setting without the stress.
Need a dining room makeover? Check out our post, “12 Designer Tested Tips for A Stunning Dining Room” for a full guide on how to revamp your dining room from start to finish.
How To Set A Formal Dining Table
There are four basic steps to ensure a gorgeous formal table setting. Proper spacing between guests, laying a beautiful foundation with a tablecloth, chargers, and the correct plates, making sure you have the right glasses for beverages, and placing utensils in their proper spots. Let’s walk through each step so you can become a seasoned hostess by the end of this article.
Step 1: Creating Comfortable Distances Between Guests
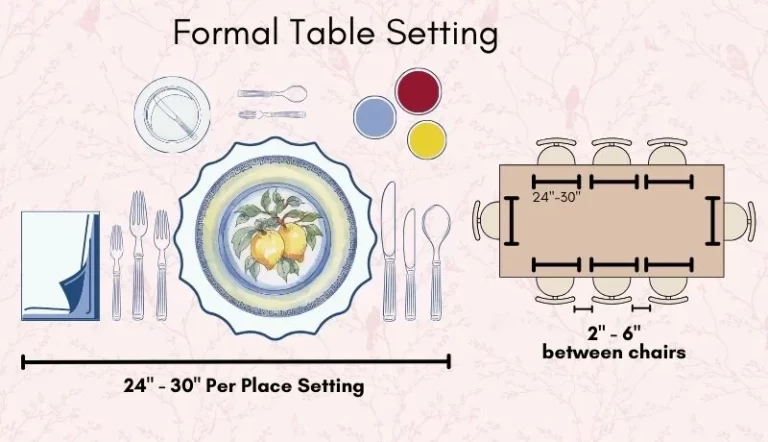
There are a few simple steps to making your guests feel special with an elegant, thoughtful tablescape. The first and most important step is to ensure the proper spacing between guests. No one wants to spill soup in their lap because they’re bumping elbows with their neighbor, nor do they want to be so far away that they have to shout to be heard.
Spacious Settings
The key to creating an intimate gathering that works is to allow a minimum of 24 inches of space per place setting. If you have room, 30 inches per guest feels spacious and is ideal. This leaves plenty of room to use cutlery with ease, but also close enough for guests to comfortably chat with each other.
Chair Spacing
Depending on how many people you need to fit at your table, you need 2-6 inches between dining chairs. Two inches between chairs is tight, but will work if you need to fit more people around the table. Six inches between dining chairs leaves room for your guests to maneuver their chair without risk of pinching their fingers.
Make sure that you have a large enough rug that your guests can comfortably pull their chairs from the table and not catch on the rug. A too small rug can make for a frustrating experience for your guests and ruin an otherwise successful evening. Check out our post, “How To Choose The Best Dining Room Rug Size” for a detailed guide.
Step 2: Foundational Features
Tablecloths
Formal table settings are all about aesthetics to create a gorgeous, refined dining experience that they’ll talk about for years. Start with a beautiful, freshly pressed tablecloth with an elegant design that isn’t too distracting or overwhelming.
Your table cloth sets the stage for all the other elements you’ll layer on top and protects your table from spills and scratches. Make sure your table cloth is clean, and coordinates with your plate and servingware.
Chargers
Next protect your table cloth by placing plate chargers under each place setting. Chargers have a dual purpose of protecting from spilled foods and hot plates leaving heat marks on your table, but also adding an additional textural layer to your tablescape. Many chargers are made from natural woven rattan, brass, gold or silver metals, and even interesting thick paper stock with a subtle design.
Plates
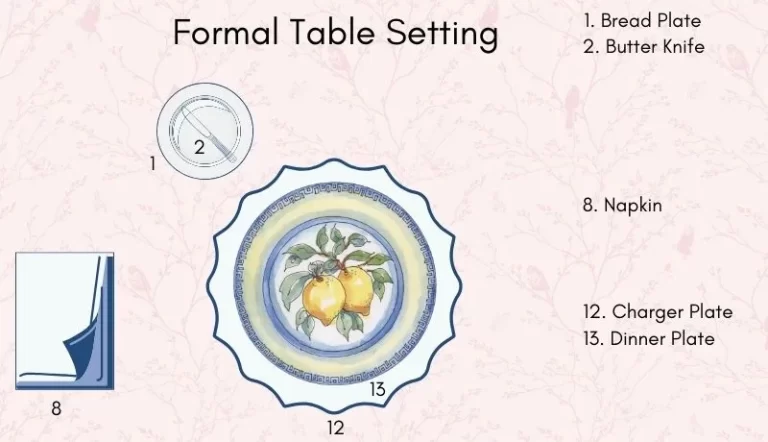
Dinner plates are between 10” – 11” in diameter and are placed centered in the table setting atop the charger. A bread plate is 7″ in diameter, and sits with the accompanying butter knife to the upper left of the dinner plate. If you are serving a salad course, the salad plate will replace the dinner plate when the main course is cleared.
Napkins
After you have set your dinner plate on top of the charger, artfully fold your guests dinner napkin and arrange it on the plate.
Hosts used to place the fork atop the napkin, but the napkin is the first thing guests reach for when they sit down. Forks can fall, or clang off of the plate and create an embarrassing moment for your guest. Now hosts will leave the forks set to the left side of the plate and the napkins, paired with your menu, on top of the plate for quick use.
Step 3: A Gallery of Glasses
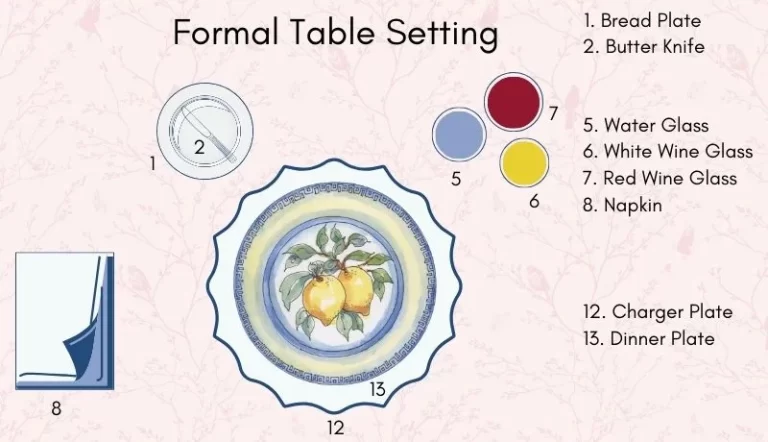
There are three main glasses at a formal dining table setting, a water glass, white wine glass, and red wine glass. All glasses are placed to the upper right of the dinner plate. The first and largest glass is the water glass. The water glass is placed closest to the plate for easy access.
A white wine glass will sit directly to the right of the water glass, and the red wine glass sits centered behind the water and white wine glasses. If you are serving sherry with dessert, a small sherry glass will sit to the right of the white wine glass.
After dinner, some guests prefer to have a cup of coffee or tea to finish the meal. The coffee cup and its coordinating plate sit between the glasses and utensils on the right side of the dinner plate.
Step 4: Courses And Cutlery
Setting a formal table can be daunting. There seems to be a tiny fork, special glass, and specific spoon for everything. Not to worry! We are going to demystify cutlery by each course so you can look like an educated, experienced host without the dusty etiquette classes.
Perfect Placement
Most formal place settings have three basic elements, cutlery, plates and bowls, and glasses. Each category has its own unique sub divisions depending on the courses you will be serving.
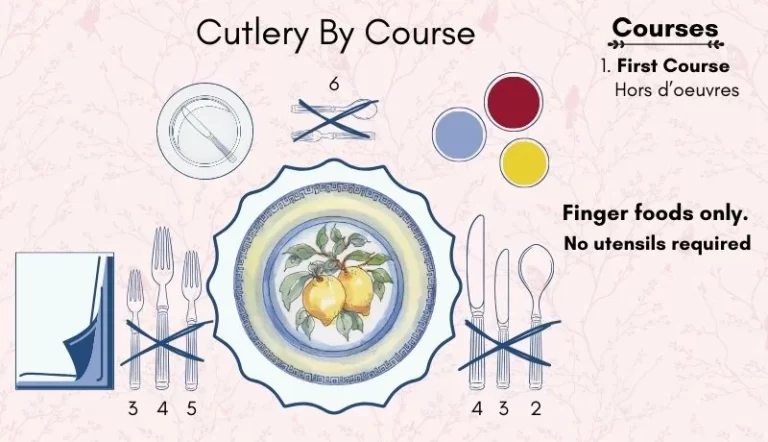
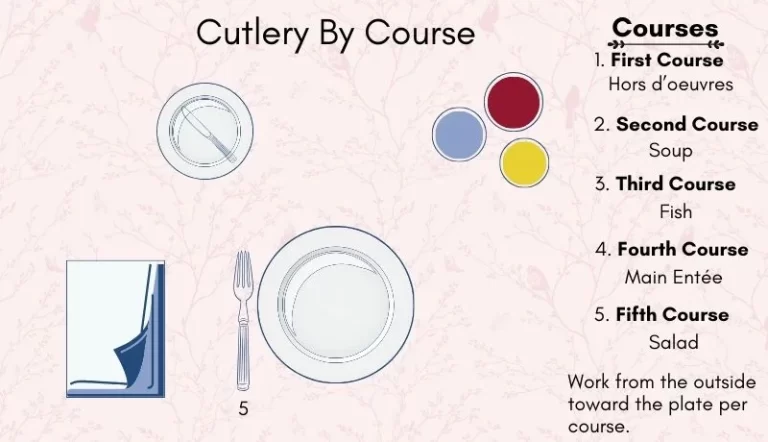
Formal meals are divided into courses, and for every course, there’s a specific set of cutlery to meet the needs of the foods that are served. For each course, you’ll work your way from the outside in towards your plate on either side. This means that you will start with the first fork on the outer left side of the plate and work your way inwards as the courses continue.
First Course Table Setting
The first course is cold hors d’oeuvres. These are small appetizers, usually finger foods, or clever combinations on small skewers that typically don’t require cutlery. First course hors d’oeuvres don’t include red meats, pastas, or starches, which are saved for later parts of the meal.
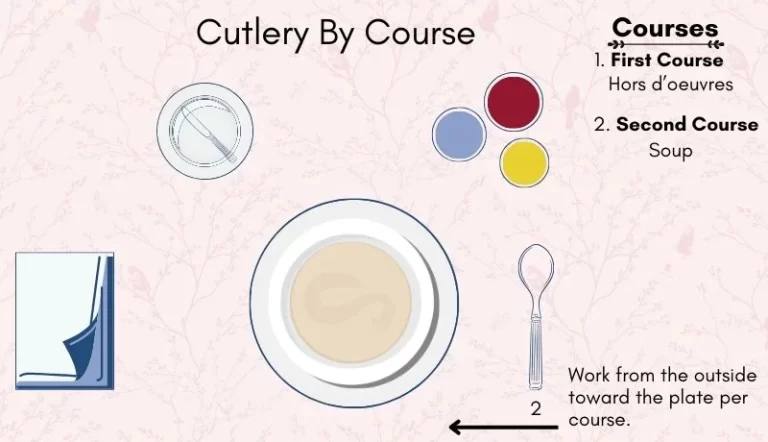
Second Course Table Setting
The second course is a soup like a lobster bisque, or butternut squash to warm the belly. For this course you will use the soup spoon on the outer right side of your plate.
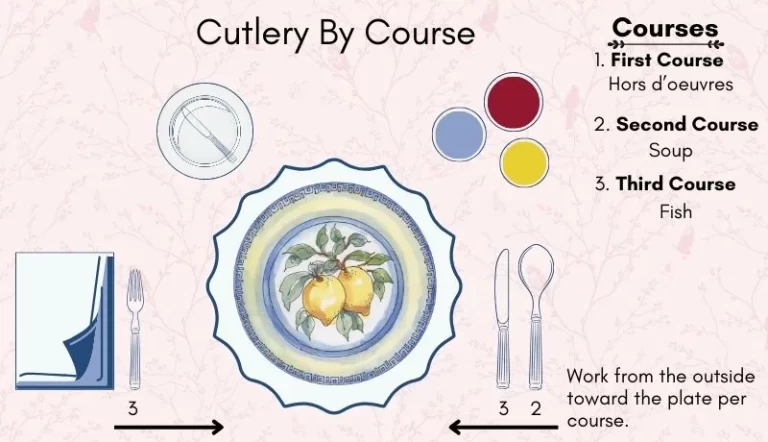
Third Course Table Setting
Third courses are some variation of a fish or light protein before the main course. Use the first small fork on the left side of the plate, called the fish fork, and the smaller knife, called a fish knife on the right side of the plate between your large dinner knife and soup spoon for this section of the meal.
These utensils are specifically designed to make eating fish easier for your guests. The fish knife has a slightly curved, sharp edge and is smaller and more maneuverable than the large dinner knife. This allows your guests to use the knife to separate the flesh of the fish from the skin and pluck away any bones.
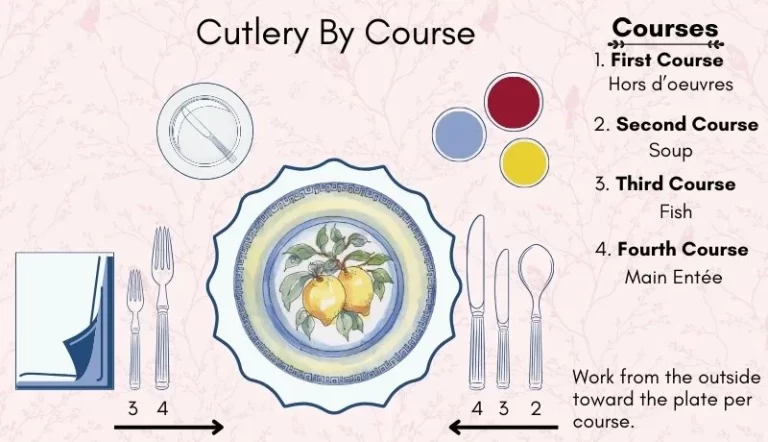
Fourth Course Table Setting
The fourth course is the star of the show and the main entrée. This is where your heavier proteins come in and your guests need more substantial cutlery to navigate cutting through denser meats like steak, lamb, chicken, or pork. Use the largest utensils, the dinner fork and dinner knife on either side of your plate to enjoy the main course.
Fifth Course Table Setting
After finishing with the main entrée, your guests can enjoy a light salad or cold dish with refreshing greens. Use your last fork, the salad fork, which is slightly smaller than your dinner fork and closest to your plate on the left side.
Finishing Touches
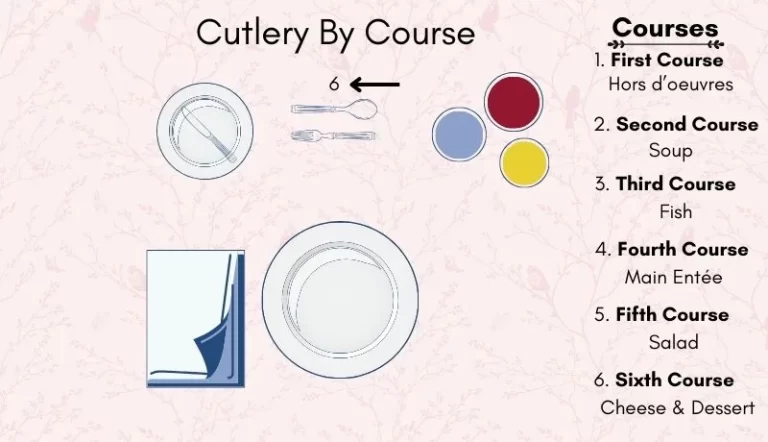
After the main courses are complete, treat your guests with an arrangement of cheeses and dessert to pair with any wines you’ll be serving. Cheese forks can either be brought out with the cheese trays or set above your plate with the dessert fork and spoon.
Dessert utensils are notably smaller than any other utensil on the table. Dessert forks typically have three tines, with the far left tine larger and flat so your guests can into pastries or pies.
Conclusion
Nothing makes a guest feel more special than knowing their host took the time to thoughtfully arrange a special dinner with all the trimmings for their enjoyment. A beautiful table can be easily achieved when you know the basic rules of proper setting placement. Once you have the foundational elements in their rightful place, adorn your table with stylish personal details for a truly memorable evening.
About the Author
Nicole Cullum is an interior designer and fine artist. Her passion for color, pattern, and balance are expressed through her hand-painted line of wallpapers and textiles available at ColorCaravan.com.
Contact Nicole at hello@ColorCaravan.com for help with your next design project, e-design services, or a custom wallpaper or textile design.

